Monday 28 July 2014

Gaps filled

Nearly all the gaps filled before I paint.  I'm amazed at how much it improves the look of it.  :)


Nearly there...

I worked like stink on the banquette today and cut the mdf for the tops ...


 then cut up the single foam mattress to fit ...


then upholstered the boards (and I only dropped the staple gun on my toe once) ...


AND then primed the base with a stain block primer...

AND THEN added cushions, just for the hell of it.  :)

I've got to clean up some of the rough edges on the base before the final coats of paint, but the end is definitely in sight.  I'm so happy with how cozy it makes the dining area look.  :)


Thursday 24 July 2014

First Panel Finished

I love pallet wood, but I don't like all the different thicknesses for panelling.  Serves me right for getting random pieces from broken pallets instead of waiting to get complete ones.

But despite my whinging, the first panel is built!  I love the rustic wood look, but I'm still resolved to paint it white.


And the second done ...


And I think I'm done for the day.

Saturday 19 July 2014

Banquette

I love going through the BHG website to find inspiration.  All the photos are so full of colour and light and they make me want to recreate that energy in my house.  If you haven't seen it, go and have a look at the decorating section.

So I was looking last week and came across some beautiful pics of banquettes, then realised it's the perfect solution for my dining room.  It's a pretty cramped space, but I didn't really want to get rid of the seating altogether.  Enter the banquette!

But all this stuff is getting pretty pricey and I couldn't really afford to buy all the timber to build it.  Then I started wondering if I could perhaps make it from old pallets?  Why not?  So after pilfering a pallet from the backyard of a smash repairer (it was on a rubbish pile) and scavenging some old discarded fence pailings from the kerbside, I was ready to go...

The white strip is that horrible double sided lino tape.  Happily, it will mostly be covered by timber so I won't have to try and get it off.  :)

All the wood is warped and crooked = the most dodgy joints of all time!


This took all day to do, after picking up the scrap wood, and by 5pm I was so tired and sore I couldn't hold the hammer anymore.  Actually, it's the first thing I've ever built where I only used nails and glue with no screws.  Hmm.  It seems sturdy enough and I suspect that Molly will be the only one who really sits there, so I'm hoping it will hold together ok.

Next step will be mdf for the top and plywood for the front and sides.  :)

Back to the Kitchen

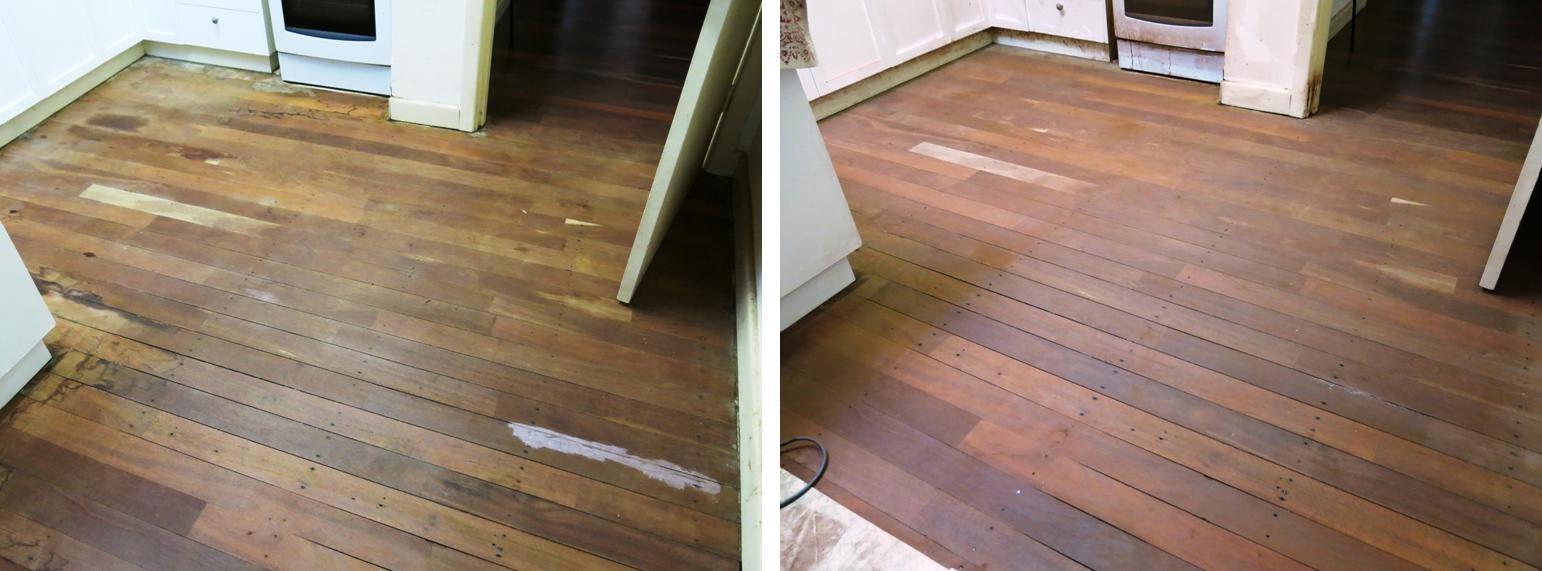
The kitchen floorboards were a lot harder than the hallway!  There was some bad staining around the counters where presumably liquids had spilled under the lino.  Pretty hard work trying to get them out with the belt sander.

Before                                            After

Before                                            After

Before                                            After

These pics were all after the first sand of 40 grit.  It certainly wasn't perfect, but after sanding with the 80 then 120 grits - I was happy enough (and also completely over the whole thing).

I can't tell you how awful it is having sawdust in your mouth, up your nose, in your ears and eyes, in your hair and in every crevice in existence.  Let me just say that I do NOT like the taste of jarrah sawdust, but that was a piece of knowledge that I could happily have lived without ever knowing.

After the first coat of Cabot's ... I didn't panic this time about the cloudiness.


And then after three coats ...


I really like the randomly coloured jarrah boards!  :)

Next the dining room, then, THANK GOD, I'll be done.

Wednesday 2 July 2014

Timber Floor - Finished! (well, the first bit anyway)

I finished it!  I was so happy with the Cabot's Water Based Sealer.  Even though it was raining hard outside, it still dried really quickly.  After 30min, Molly could walk on it without marking (she stayed off the final coat), and after 3 hours I could put a little piece of cardboard on it to use as a stepping stone. 16 hours later I put a cloth over it so I could walk over without socks.

I saw a Cabots vid on youtube where the man said after 24 hours you can put furniture back on, but on the tin it says 72 hours, so I'm waiting the 3 days before I take the cloth off, just to be sure.


It's very hard to get a photo that does it justice, but I love the satin finish, especially with the comparatively rough job I did.  It's rustic, baby!  I can say that the rough edges were deliberate to give it an aged feel.  :)

Next will be the kitchen, but I need a break for a bit first.  My knees feel a bit damaged and my arms and shoulders are still aching.  Plus, I need to wait for a friend to come and help me move the fridge.